Food Storage Challenge~ In The Thinking Stage
>> Tuesday, January 11, 2011
I am working on the first assignment of the Food Storage Challenge at my friend Lori's blog. It is going slowly for me right now being sick with a bad cold and I think we finally finished packaging the seeds up for the seed business. I have to admit I am still in the thinking stage. I am taking mental notes of what we have stored up and what holes need filling. I have had sooooooo much fun looking through all my cookbooks and making a dream menu list of what I would like to make. Then I should probably take it down a notch or two. *grin* It's got me looking at things I have always wanted to try to make and got me thinking about it again. One thing I thought looked too hard to make really didn't look that hard this time round. I want to make cottage cheese. I tried one way once and did not like it because you used vinegar and that was all I could taste when I had made it. But I have a recipe for another way that I thought was too hard but doesn't use vinegar. And I think I will try making it when I am not sick with a bad cold. In some ways it reminds me of making yogurt. If it works out for me I am happy to write a tutorial on it for Friday Farm Girls @ Heart. The only thing I need for it is buttermilk. [0= But other than that I have a bit to go in picking what I want to put on my menu plan and then I need to break it down what I still need.
- On a piece of paper, or on your computer, make a list of 7 things your family likes to eat for breakfast, then 7 things your family likes to eat for lunch, then 7 things your family likes to eat for dinner, and finally 7 things your family likes to eat for dessert. Keep in the back of your mind that we're going for food storage, so try to list things that are easy to make and that aren't largely dependent upon fresh produce! (If you're at a loss for what kinds of things to select, or just want some ideas or new recipes, Wendy lists a number of them on her site...click HERE to view the post, and you'll find the meal ideas almost halfway down the page.)
- Next, you'll need 29 file cards (or file-card-size pieces of paper). Divide these into four piles of 7 cards, with one card leftover (it is your "Bread Card").
- Take your first set of 7 cards, and at the top of each card write down the name of an *uncomplicated breakfast that you could make for your family and which you could eat once a week for 13 weeks (3 months). You should have 7 cards, each one with a different breakfast name written at the top. They can be similar, like "Oatmeal w/strawberries" and "Oatmeal with cinnamon and raisins," that's fine. If you eat Granola every single morning, then you'll have 7 cards that each have the same "title" at the top: "Granola."
Take your 2nd set of 7 cards, and at the top of each card, write the name of an *uncomplicated lunch which you could feed your family and which you could eat once a week for 13 weeks (3 months)...7 cards, 7 different lunches.
Take your 3rd set of 7 cards, and at the top of each card, write the name of an *uncomplicated dinner which you could feed your family and which you could eat once a week for 13 weeks (3 months)...7 cards, 7 different dinners.
Take your 4th set of 7 cards, and at the top of each card, write the name of an *uncomplicated dessert which you could feed your family and which you could eat once a week for 13 weeks (3 months)...7 cards, 7 different desserts.
*It is up to you if you feel you're doing this food storage for an emergency where you will assume you have no access to electricity or running water, or if you're doing it assuming an extreme economic hardship like a job-loss, but you'll still have an oven/stove/microwave, etc. You should select your meals accordingly...if you want waffles, you can store the ingredients, NO PROBLEM! But you're assuming you'll be able to plug in your waffle iron, unless you have a cast iron waffle pan and can cook them over an open fire. *grin* - Now, for each card you've made, on the left side, make a list of every ingredient you would need to prepare that recipe for your family. Don't leave anything out...include the water needed to boil things like pasta and rice,especially if you want to plan for a scenario where you would not have running water available to you.
- Next, multiply each ingredient by 13 and list it on the right side of each card (there are 13 weeks in 3 months). Here, for example, is one of my breakfast cards:
Mastering the Art of Yogurt Making
>> Friday, January 7, 2011
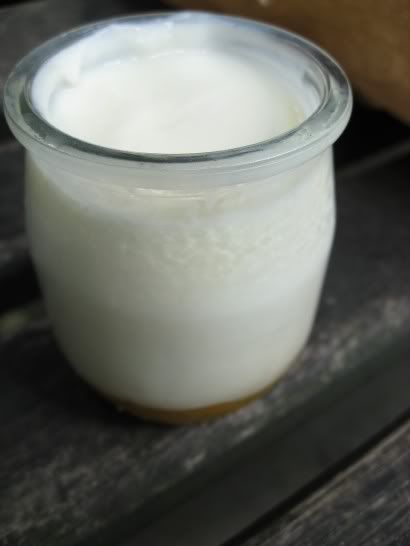
I wanted to share the method that helped me finally master the art of yogurt making. I have tried different ways and had always had runny yogurt. I was about to give up and then I found a way I could master the art of yogurt making.
.
How to Master The Art of Yogurt Making
First warm your oven to about 350* for 4 minuets and then turn off oven and leave on the oven light. While I had done this I heated up my half gallon of milk on medium heat on the stove to 180* . ( it took me about 30 minutes ) I monitored this with my candy thermometer. I turned off the burner and set the pan on the table on a hot pad to cool near me where I was knitting. I let it cool down to about 115* to 120*. I took out one cup of the warm milk and wisked 4 Tablespoons of yogurt with active bacteria ( my starter). I then poured it back into the pan and wisked it a bit more. After you have mixed it then pour into clean quart jars and place on a cookie sheet in the warm oven. Leave the oven light on and let the yogurt set between 4-8 hours till thickened. If you let it go beyond 8 hours it will be more sour.
.
I calculated by making your own yogurt you can spend 1/4 th the cost of what it would cost you in the store.
.
To Make It Even More Tightwad’ish…
.
One way to make this even more of tightwad’ish tip is to take your store bought yogurt (…your starter) and pour and freeze in ice cube trays. After frozen transfer future yogurt cubes into a zip-lock bag and place in freezer till you need them. Two ice cubes equals 4 Tablespoons. When you need your starter defrost 2 ice cubes and bring them to room temperature and use.
. You can also piggyback starters by using some of the yogurt from your batches of yogurt up to 3 or 4 times (piggy backing). And then you need to defrost another 2 yogurt ice cubes to start over again. If you try to piggy back over 4 times you are more than likely get tarter yogurt. This makes it so it is just pennies in your cost of yogurt starter.
.
Extra Hints
…if your starter is tart you will probably get tart yogurt.
.
Only make enough yogurt that you will use up in 5 days and then make another batch.
.
I found if I wanted a thicker yogurt I used 2 % or whole milk. Or after you make your yogurt with 1% milk or skim you can strain on a coffee filter or cloth like a pillow case in a colander to make a more Greek style yogurt. ( save whey to use in bread or soup ).
.
PS: I found this neat fact( from here)...
Flu Fighter #2: Yogurt
Yogurt contains probiotics — good bacteria that line our intestines and defend our body against invading germs. Buy plain yogurt to get fewer calories and less added sugar than you do from fruit-flavored versions, and add your own sweetness with a teaspoon of honey (which may also be an immune booster, because it feeds good bacteria in our gut). To make sure your yogurt contains probiotics, look on the container for the National Yogurt Association's "Live and Active Cultures" seal, which means there are at least two types of healthy bacteria and 100 million bacteria per gram.