Showing posts with label Friday Farm Girls. Show all posts

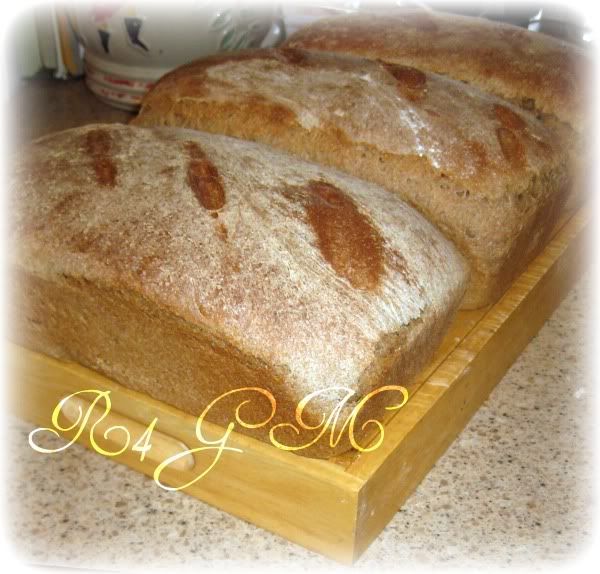
Friday Farm Girls ~ Super Simple Bread Recipe

>> Friday, February 18, 2011


This is the recipe that started my bread making career way back when I was 12 years old. *grin* If you haven't made bread before it is a wonderful starting point. This bread is made with store bought flour which acts different than home ground wheat. If you want to make bread from freshly ground flour then go HERE.


~Super Simple Bread Recipe~

Soften in a small bowl for a few minutes till frothy.


-1 rounded Tablespoon or one package of active dry yeast

-1/4 cup of warm water ( can test temperature by using a candy thermometer and you want it to be between 105 to 115*F)

- 1 Tablespoon sugar


~Combined in a large bowl:

-2 cups scalded milk ( heat till steamy but do not boil)

-2 Tablespoons sugar

-2 Tablespoons salt

-2 Tablespoons shortening or... margarine or.... butter.


~Cool to lukewarm and add:

-yeast mix

-2 cups of flour

Beat with mixer for 5 minutes. Add enough flour to make a firm ball. Which is about 4 cups flour. Knead until smooth.


-cover with a cloth and let it rise 30 minutes.

-Punch down

-divide dough into 2 pieces.


-Rolls each into a rectangle.

-roll up to a firm smooth loaf.

-place in a buttered bread pan and place into oven at 200 *F for 1 hour ( check at 30 min.) until doubled in size.

-Bake at 375 for 30-35 minutes.

Plans4You


( To read other Farm Girls @Heart and/or join in on the fun go visit my friend Lori's blog by clicking on the graphic)


Read more...

My Favorite Whole Wheat Bread Recipe and Dough Enhancers

>> Friday, February 11, 2011


Update:

I will share next week how to make some simple breads using flour bought from the store. They DO act differently than home ground flour.


Using Dough Enhancers When Making
"
Home Ground" Whole Wheat Bread


Sense last summer I have been figuring out how to make yummy things from grinding my own wheat in our grain grinder. I haven’t been fully happy with my bread till last summer. The change ? It was using dough enhancers. I haven’t bought any pre-made ones because it had things that my 2ds is allergic to. So of course I have been researching on the net. And I found some answers. ((happy dance))

Here is a link to a neat video Dough Enhancer for making Homemade Bread


*******Here is the bread recipe that I used and loved ! It is at BreadExperience .com **********


Tips for using your own everyday items as dough enhancers in WHEAT BREAD: (It’s best to use ALL THREE of these enhancers when making whole wheat bread)

Gluten: use 1/2 T. – 1 T. per cup of flour (this means before you measure a cup of flour place the 1/2 T.-1 T. gluten in the bottom of your cup and then measure flour as usual)

Apple Cider (or white) Vinegar: use the same amount of vinegar that you are using for yeast (i.e. 1 t. yeast – 1 t. vinegar)
I have to say that prefer to use Apple Cider vinegar because it is healthier and more natural but white vinegar works just fine.

Potato Flakes or Potato Startch: use 1/8 to 1/4 C. per loaf of bread you are making, experiment to see what works best in your recipe. (do not substitute in potato pearls, they don’t dissolve as easily and are artificially flavored which you will be able to taste in your bread)

If you are making bread and want to give a extra umph try it and here is some must sees in how to make really good bread videos. I learned soooooooo much from this gal and I have been making bread for 30 years.

***Lately I haven't been using Potato Starch and it does pretty okay. It you make some bread from this recipe I hope you share that you did. I would love to hear how it worked.


Here is a series of videos that REALLY helped me in this learning curve.

1/8 Making Fresh Ground Whole Wheat Bread


2/8 Making Fresh Ground Whole Wheat Bread


3/8 Making Fresh Ground Whole Wheat Bread


4/8 Making Fresh Ground Whole Wheat Bread


5/8 Making Fresh Ground Whole Wheat Bread


6/8 Making Fresh Ground Whole Wheat Bread


7/8 Making Fresh Ground Whole Wheat Bread


8/8 Making Fresh Ground Whole Wheat Bread


Participating in ....


Plans4You


Read more...

Friday Farm Girl~ Doodle Stitching and Other Projects

>> Friday, February 4, 2011

Today in my Farm Girls @Heart post I want to share how I have discovered the love of Doodle Stitching. In years past I use to cross-stitch but now I have found with all the things this homeschool mama has to do. The mental power to do cross-stitching is to much. I like needlework that is more freeing and forgiving. I like how the author encourages you to carry on and create your own designs. I hope this coming year to spend some time each week just...doodling. And I hope to be able to create some of my own doodles. I love crafts that I can just play with colour and shapes and only the sky is the limit.


I also have been knitting a shawl for a charity. I hope in the next week or so this will be done. I have done a lot of complex designs but sometimes a very simple one will stump me, lol. The middle yarn overs that create the lacy holes sometimes will move to one side or the other. Not what I want. I have to be very careful this doesn't happen. I don't know if you can see it very well but I made a beaded stitch marker. I hope to be making some to put in a Etsy store. Trying to find a way to sell my crafts and not have to leave the home to do it.


Plans4You

( To read other Farm Girls @Heart and/or join in on the fun go visit my friend Lori's blog by clicking on the graphic)


Read more...

Friday Farm Girls~ Dreaming of Future Sewing Projects

>> Friday, January 28, 2011


Part of being a Farm Girl @Heart is dreaming of what you want to create next. I have had a re-birth of the desire to learn to sew more and better. I have very basic skills and want to expand on them and have fun building one skill at a time with one project at a time. I have dedicated a section of my Learning Room as my sewing area. I want to have a space to be creative in this way. I love how it is also not too far from my wood stove and I will have a chance to enjoy it too. Here I have shared links to many of my dream projects and I have also invested some sewing books that I hope to share as I start using them this year. Do you have any dream projects you want to learn? What are they? Share please. [0=


Plans4You

( To join in on the fun go visit my friend Lori's blog by clicking on the graphic)

Read more...

Dyeing Wool With Food Coloring or Kool Aide

>> Friday, January 21, 2011


I was going through my craft patterns last night and found my notes on how to dye wool with food coloring or Kool Aide. I sure am getting the itch to try my hand at it once again this winter.

On January 10th, 2010 I posted on my old blog of my experience dyeing wool with food coloring and had to share it with you all. I have have been enjoying my hand dyed wool Calorimetry headband this fall and winter. ( pattern HERE)

(January 2010)

I have been wanting to dye my own wool for years but never have had the courage to. But I keep hearing about those ( my older brother included) who have dyed animal fibers with Kool Aide. It is a safe and wonderful non fussy way to do it in your own kitchen. You even can use your crockpot ! My crockpot has become one of my most favorite tightwad tools.

.

My brother gave me some white sheeps wool last year. I have been holding onto it for awhile and decided to take the plunge and dye it. But as I was researching how to dye it I found out you can also dye it with food colouring ! This neat must see homestead video that shows how to dye wool with Kool Aide. Off there they gave a link in in their more info a very well written out instructions too and a neat link to food colour dyeing your wool.

.

Here I am winding my wool into a hank of yarn.

.

I tied my hank in several places to hold it together while I dye it. ( suggestion here: tie very loose or it will give a tie dye ring…not reccomended unless you want that look.)

.

Here I am soaking my wool in a vinegar and water bath over night to help it to absorb the dye better.

.

Here is my yarn in the crockpot after I have poured my food coloring mix into it. Please watch video and read the instructions on the side. It explains it very well. There is one other site that I recommend to read too. Go HERE.

.

This is what the water looks like after it has exausted all the colour from the water. It is so fun to keep peeking in and seeing it disapear. This is a GREAT science experiment with learning color therory. I had a ton of fun mixing my own colours with the food colouring.

.

TA DA ! Here is my first tries !

((((HAPPY DANCE)))

.

And my second tries !!

.

I thought I would show what my knitting basket looks like right now. The top right corner shows the two balls of yarn that I dyed the second time round. Doesn’t this make you want to try it ?!?


Plans4You

( To join in on the fun or check out other Friday Farm Girls @Heart posts click on the graphic and go visit my friend Lori)


Read more...

Shalom ( Cardigan)

>> Thursday, January 13, 2011


Picture taken by Nicolas 10 yo

I was finally able to get a sweet ds to take my picture of my new FO ( finished object) my Shalom Cardigan ( the pattern is HERE but I used THIS alterations to it.) . *GRIN* I love my new cardi so much. The wool I picked is so soft and a joy to wear. I have some green cotton yarn to make a different sweater( that is a bit complicated for my full brain) but I am now thinking maybe a Shalom II might be a choice. [o= One thing I would do different is make the sleeves a bit longer. Just long enough to go over my elbows and I want to try using the moss stitch instead of the garter stitch for the edges and cuffs. I just love the 3/4 length sleeves. I have some other FO's I want to share and I need to take some time this week or next to get some pictures of them for you.

Plans4You
( To join in on the fun go visit my friend Lori's blog by clicking on the graphic)

Read more...

Mastering the Art of Yogurt Making

>> Friday, January 7, 2011


I wanted to share the method that helped me finally master the art of yogurt making. I have tried different ways and had always had runny yogurt. I was about to give up and then I found a way I could master the art of yogurt making.

.


How to Master The Art of Yogurt Making

First warm your oven to about 350* for 4 minuets and then turn off oven and leave on the oven light. While I had done this I heated up my half gallon of milk on medium heat on the stove to 180* . ( it took me about 30 minutes ) I monitored this with my candy thermometer. I turned off the burner and set the pan on the table on a hot pad to cool near me where I was knitting. I let it cool down to about 115* to 120*. I took out one cup of the warm milk and wisked 4 Tablespoons of yogurt with active bacteria ( my starter). I then poured it back into the pan and wisked it a bit more. After you have mixed it then pour into clean quart jars and place on a cookie sheet in the warm oven. Leave the oven light on and let the yogurt set between 4-8 hours till thickened. If you let it go beyond 8 hours it will be more sour.


.

I calculated by making your own yogurt you can spend 1/4 th the cost of what it would cost you in the store.

.


To Make It Even More Tightwad’ish

.

One way to make this even more of tightwad’ish tip is to take your store bought yogurt (…your starter) and pour and freeze in ice cube trays. After frozen transfer future yogurt cubes into a zip-lock bag and place in freezer till you need them. Two ice cubes equals 4 Tablespoons. When you need your starter defrost 2 ice cubes and bring them to room temperature and use.

. You can also piggyback starters by using some of the yogurt from your batches of yogurt up to 3 or 4 times (piggy backing). And then you need to defrost another 2 yogurt ice cubes to start over again. If you try to piggy back over 4 times you are more than likely get tarter yogurt. This makes it so it is just pennies in your cost of yogurt starter.

.


Extra Hints

…if your starter is tart you will probably get tart yogurt.

.

Only make enough yogurt that you will use up in 5 days and then make another batch.

.

I found if I wanted a thicker yogurt I used 2 % or whole milk. Or after you make your yogurt with 1% milk or skim you can strain on a coffee filter or cloth like a pillow case in a colander to make a more Greek style yogurt. ( save whey to use in bread or soup ).

.


PS: I found this neat fact( from here)...

Flu Fighter #2: Yogurt

Yogurt contains probiotics — good bacteria that line our intestines and defend our body against invading germs. Buy plain yogurt to get fewer calories and less added sugar than you do from fruit-flavored versions, and add your own sweetness with a teaspoon of honey (which may also be an immune booster, because it feeds good bacteria in our gut). To make sure your yogurt contains probiotics, look on the container for the National Yogurt Association's "Live and Active Cultures" seal, which means there are at least two types of healthy bacteria and 100 million bacteria per gram.

Plans4You
To see more Farm Girls @ Heart or want to join in on the fun go see my friend Lori's blog by clicking the graphic.

Or visit Trish at...

Read more...

Knitting Woolly Socks

>> Friday, December 31, 2010


I have been busy busting my yarn stash this fall and winter and felt what a great thing to share on FFG@H. This year my MIL only suggested a few things for a gift ideas for her and one of them was a pair of my hand knitted socks. *grin* I was so thankful I had some sock yarn in my stash and I got busy.

I have been knitting for ohhh what seems like forever. I learned from my mom in mid to late elementary. And then became a avid knitter in junior high. But in all honesty I didn't take the leap to learn socks till about 6 or 7 years ago. I was scared of the heel. Now I feel silly but it did help to see someone knit the heel. I am a visual learner. And now I LOVE knitting socks and it is very therapeutic knitting in the round. I am hoping this up coming year to try some fancy lace knitted ones. Up until now I have enjoyed using smart yarn which is computerized striped dyed yarn. It makes the stripes and I don't have to think about it. *grin*

I have found these socks amazing. They are not too thick and they are very long lasting. My family loves them and I have a list of orders from them now that they see me knitting them again.

This years knitting goals are..... I want to make a drop spindle with two CD's and I want to learn how to knit two socks at the same time on two circular needles. If you want to learn how go....


If you want to find all kinds of neat patterns.( a lot for free) I suggest to join http://www.ravelry.com/ a online knitters and crocheters community. I have had so much fun there. If you do join look for me Canadagirl. And befriend me too, *grin*.


Plans4You
( to join in on the fun click the graphic and visit my sweet friend Lori)

Read more...

Making Rose Hip Syrup

>> Friday, December 17, 2010


I forgot to mention that rose hip syrup is a real good source for vitamin C. It has a lot more vitamin C than a orange.


Making Rose Hip Syurp

Ingredients
  • 7 cups of water
  • 1-2 cups of sugar
  • 4 cups of rose hips topped and tailed

Method

- Semi-Roughly chop rose hips in food processor
- Bring 6 cups of water to boils


-put chopped rose hips into boiling water
-bring back to boil and then take off burner
-let it steep for 15 minutes


-strain through a cheese cloth or sterilized jelly bag or what I use is a sterilized curtain sheer
- Then boil the last cup and a half and put the rose hip paste back into water
-bring back to boil and take off burner again and let it steep for 15 minutes
-Pour back into clean pan add sugar and boil rapidly for 5 minutes
-Pour into sterilized bottles or jars and seal
-give it a hot water bath for 5 minutes in canner


Things I learned making it...

  1. Pick rose hips after first heavy frost and don't wait for it to snow.
  2. cut rose hips off the rose bush with rubberized garden gloves and scissors
  3. add sugar to taste...try half a cup of sugar till you like the taste. After the first hard frost it makes the rose hips sweeter and you may not need as much sugar or at all. ( depends on taste)
I hope if you try this you will let me know how it went for you. I would love to know. Ohhh I almost forgot to say that you take a Tablespoon a day for good health.

Plans4You
( to join in on the fun click the graphic and visit my sweet friend Lori)

Read more...
Related Posts with Thumbnails

About This Blog

Lorem Ipsum

About This Blog

  © Blogger templates Sunset by Ourblogtemplates.com 2008

Back to TOP