Friday Farm Girls ~ Super Simple Bread Recipe
>> Friday, February 18, 2011
( To read other Farm Girls @Heart and/or join in on the fun go visit my friend Lori's blog by clicking on the graphic)
 Read more...


 Read more...
Update:
I will share next week how to make some simple breads using flour bought from the store. They DO act differently than home ground flour.
Using Dough Enhancers When Making "Home Ground" Whole Wheat Bread
Sense last summer I have been figuring out how to make yummy things from grinding my own wheat in our grain grinder. I haven’t been fully happy with my bread till last summer. The change ? It was using dough enhancers. I haven’t bought any pre-made ones because it had things that my 2ds is allergic to. So of course I have been researching on the net. And I found some answers. ((happy dance))
Here is a link to a neat video Dough Enhancer for making Homemade Bread
*******Here is the bread recipe that I used and loved ! It is at BreadExperience .com **********
Tips for using your own everyday items as dough enhancers in WHEAT BREAD: (It’s best to use ALL THREE of these enhancers when making whole wheat bread)
Gluten: use 1/2 T. – 1 T. per cup of flour (this means before you measure a cup of flour place the 1/2 T.-1 T. gluten in the bottom of your cup and then measure flour as usual)
Apple Cider (or white) Vinegar: use the same amount of vinegar that you are using for yeast (i.e. 1 t. yeast – 1 t. vinegar)
I have to say that prefer to use Apple Cider vinegar because it is healthier and more natural but white vinegar works just fine.
Potato Flakes or Potato Startch: use 1/8 to 1/4 C. per loaf of bread you are making, experiment to see what works best in your recipe. (do not substitute in potato pearls, they don’t dissolve as easily and are artificially flavored which you will be able to taste in your bread)
If you are making bread and want to give a extra umph try it and here is some must sees in how to make really good bread videos. I learned soooooooo much from this gal and I have been making bread for 30 years.
***Lately I haven't been using Potato Starch and it does pretty okay. It you make some bread from this recipe I hope you share that you did. I would love to hear how it worked.
Here is a series of videos that REALLY helped me in this learning curve.
1/8 Making Fresh Ground Whole Wheat Bread
2/8 Making Fresh Ground Whole Wheat Bread
3/8 Making Fresh Ground Whole Wheat Bread
4/8 Making Fresh Ground Whole Wheat Bread
5/8 Making Fresh Ground Whole Wheat Bread
6/8 Making Fresh Ground Whole Wheat Bread
7/8 Making Fresh Ground Whole Wheat Bread
8/8 Making Fresh Ground Whole Wheat Bread

 Read more...


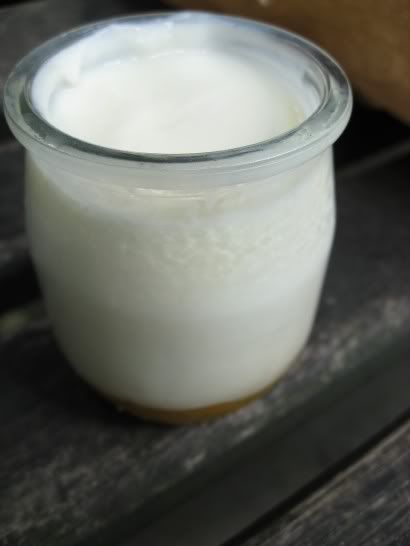
I wanted to share the method that helped me finally master the art of yogurt making. I have tried different ways and had always had runny yogurt. I was about to give up and then I found a way I could master the art of yogurt making.
.
How to Master The Art of Yogurt Making
First warm your oven to about 350* for 4 minuets and then turn off oven and leave on the oven light. While I had done this I heated up my half gallon of milk on medium heat on the stove to 180* . ( it took me about 30 minutes ) I monitored this with my candy thermometer. I turned off the burner and set the pan on the table on a hot pad to cool near me where I was knitting. I let it cool down to about 115* to 120*. I took out one cup of the warm milk and wisked 4 Tablespoons of yogurt with active bacteria ( my starter). I then poured it back into the pan and wisked it a bit more. After you have mixed it then pour into clean quart jars and place on a cookie sheet in the warm oven. Leave the oven light on and let the yogurt set between 4-8 hours till thickened. If you let it go beyond 8 hours it will be more sour.
.
I calculated by making your own yogurt you can spend 1/4 th the cost of what it would cost you in the store.
.
To Make It Even More Tightwad’ish…
.
One way to make this even more of tightwad’ish tip is to take your store bought yogurt (…your starter) and pour and freeze in ice cube trays. After frozen transfer future yogurt cubes into a zip-lock bag and place in freezer till you need them. Two ice cubes equals 4 Tablespoons. When you need your starter defrost 2 ice cubes and bring them to room temperature and use.
. You can also piggyback starters by using some of the yogurt from your batches of yogurt up to 3 or 4 times (piggy backing). And then you need to defrost another 2 yogurt ice cubes to start over again. If you try to piggy back over 4 times you are more than likely get tarter yogurt. This makes it so it is just pennies in your cost of yogurt starter.
.
Extra Hints
…if your starter is tart you will probably get tart yogurt.
.
Only make enough yogurt that you will use up in 5 days and then make another batch.
.
I found if I wanted a thicker yogurt I used 2 % or whole milk. Or after you make your yogurt with 1% milk or skim you can strain on a coffee filter or cloth like a pillow case in a colander to make a more Greek style yogurt. ( save whey to use in bread or soup ).
.
PS: I found this neat fact( from here)...
Yogurt contains probiotics — good bacteria that line our intestines and defend our body against invading germs. Buy plain yogurt to get fewer calories and less added sugar than you do from fruit-flavored versions, and add your own sweetness with a teaspoon of honey (which may also be an immune booster, because it feeds good bacteria in our gut). To make sure your yogurt contains probiotics, look on the container for the National Yogurt Association's "Live and Active Cultures" seal, which means there are at least two types of healthy bacteria and 100 million bacteria per gram.
 Read more...

 Read more...
© Blogger templates Sunset by Ourblogtemplates.com 2008
Back to TOP